
We have discussed about exact data match here. In this blog I will walk you through detailed steps on how to create a custom EDM SIT.
Creating and making an exact data match (EDM) based sensitive information type (SIT) available is a multi-phase process. You can use the new experience the existing classic experience, or PowerShell.
New EDM Experience
The new EDM experience combines the functionality of the EDM schema and EDM SIT tools into a single user-friendly workflow. Here’s what it offers:
Simplified Workflow:
In the new experience, schema creation and SIT definition happen seamlessly within one interface.
Fewer clicks: You’ll find it easier to set up your EDM rules and mappings.
Clearer guidance: Better instructions on mapping primary elements to default SITs.
Enhanced confidence levels: Understand default confidence levels for the rules.
Automated Schema and SIT Creation:
The new experience streamlines the process by automatically creating both the schema and the SIT.
This automation ensures consistency and reduces manual effort.
Additional Guardrails for Performance:
The new experience provides guardrails to prevent common pitfalls and optimize performance.
It helps you avoid mistakes that might impact accuracy or efficiency.
Classic Experience
The classic experience, on the other hand, is the existing interface you might be familiar with. Here are its characteristics:
Separate Schema and SIT Tools:
In the classic experience, you create the EDM schema and SIT separately.
This can lead to more steps and potential confusion.
Manual Configuration:
You’ll need to set up the schema and SIT manually, which may require additional clicks and attention to detail.
While it offers flexibility, it lacks the streamlined approach of the new experience.
Choosing the Right Experience
If you value simplicity, automation, and clear guidance, go for the new experience.
If you’re comfortable with the classic approach and need more granular control, stick with it.
Remember, both experiences achieve the same goal: protecting sensitive data using EDM SITs. Choose the one that aligns best with your workflow!
The new experience will tell you where exactly you are in the process while creating the EDM SIT.
- Data upload percent
- Data not yet uploaded
- Data upload complete
- Indexing complete
- Data upload failed
- Data indexing failed
The new experience doesn’t support mapping of multiple SITs to the same schema. Whenever you create a SIT using the new experience, a new schema gets created. This results in 1:1 mapping. Hence you cannot create more than 10 EDM SITs using the new experience ( You can only create a maximum of 10 schemas)
In classic experience you can map multiple EDM SITs to the same schema and hence you can go beyond 10 SITs.
If there is a need to specify a name to your schema manually then you can use the classic experience as the new experience creates the schema automatically and doesn’t provide an opportunity to add a custom name.
Schemas that you create using the classic experience or PowerShell aren’t visible in the new experience.
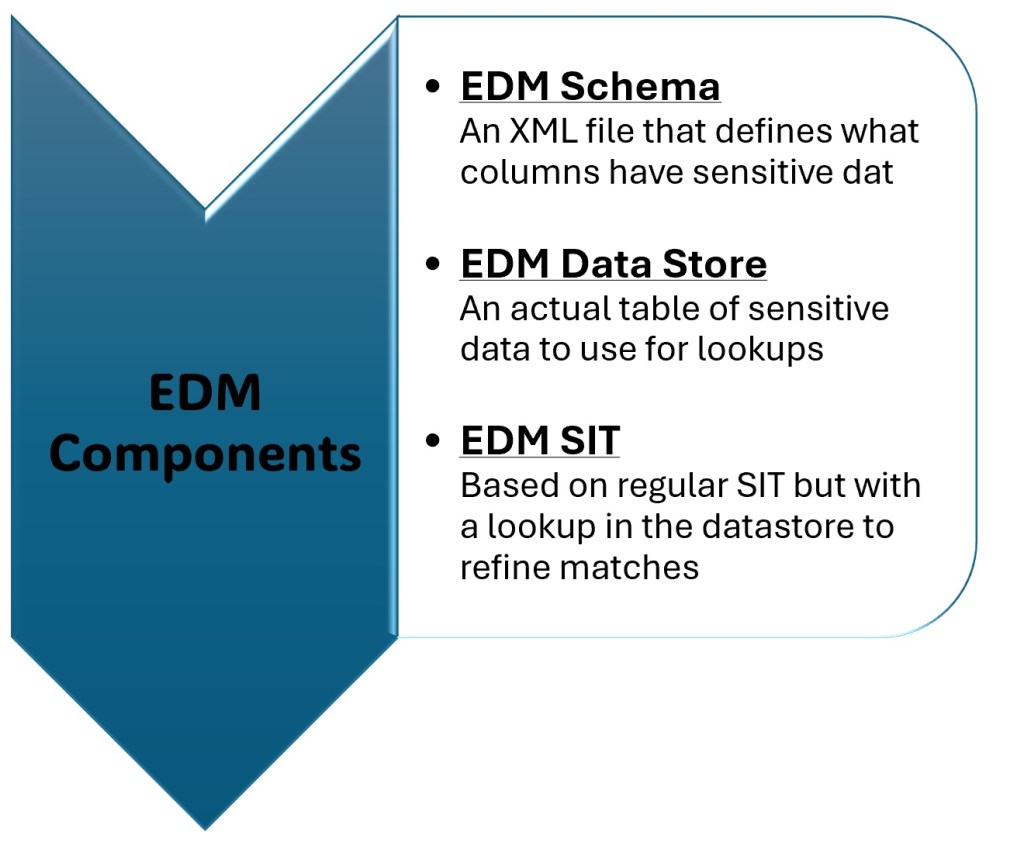
Components of EDM SITs
Before we start creating a custom EDM SIT, it’s quite important to know the various components that make an EDM SIT.
In this blog post I am going to cover the steps to create EDM SIT using the New Experience.
The new experience has 4 steps to create a custom EDM SIT.
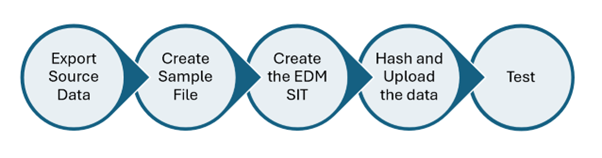
Export Source Data
The sensitive data table is a text file containing rows of values against which you compare the content in your documents to identify sensitive data.
I have saved the source data in a CSV file. With FamilyID, EmployeeName, PAN and City. (The values are fake and used just to create and test the EDM SIT)
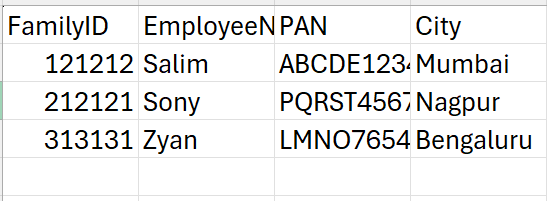
The supported format are .csv, .tsv, or pipe-separated format. I have saved the file as CSV.

The data file can include a maximum of:
- Up to 100 million rows of sensitive data
- Up to 32 columns (fields) per data source
- Up to 10 columns (fields) marked as searchable
When creating an Exact Data Match (EDM) sensitive type, you’ll want to decide which fields are your primary ones. These primary fields should have a detectable pattern and be defined as searchable columns in your EDM schema.
You can use sample file templates to make selecting your primary filed easier. Few of the sample templates that are available are U.S. Healthcare data, U.S. Financial data and U.S. Insurance data
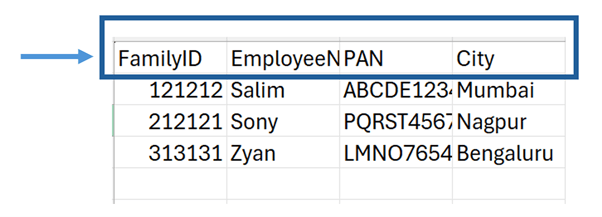
The first row of your file includes the names of the fields used for EDM-based classification. The column header names can’t include spaces or underscores.
Create the sample file
While formatting the sample file it’s important to consider the below mentioned points.
- Use about 10-20 rows of data to ensure that the system has enough samples to work with.
- Field values that contain commas must be enclosed in quotes “.
- The first row must be the header row and contain column names.
- The file must contain at least one row of data.
- Each row of data must contain the correct number of fields, corresponding to the headers.
- The sample file can contain up to 32 columns.
- The sample file can’t exceed 2.5 MB in size.
- Column (field) names must start with a letter, be at least three characters long, and consist of only alphanumeric characters (A-Z, a-z, 0-9) and can’t include spaces, underscores, or other special characters.
Create the EDM SIT
In order to create the EDM SIT, I will login to the purview portal https://compliance.microsoft.com/ using my admin credentials. And then navigate to Data classification, classifier, and EDM classifiers.
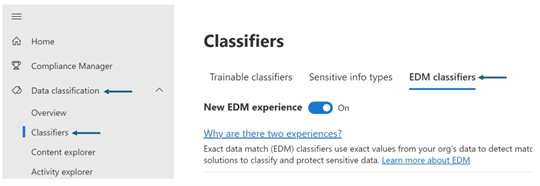
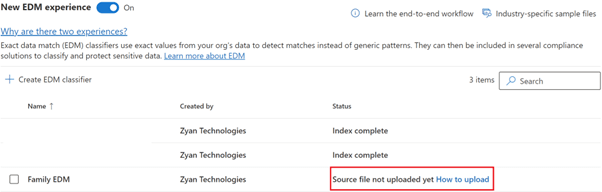
The new EDM experience switch lets you decide between the new experience and the classic experience.
Since I am using the new experience, I will keep the switch on.
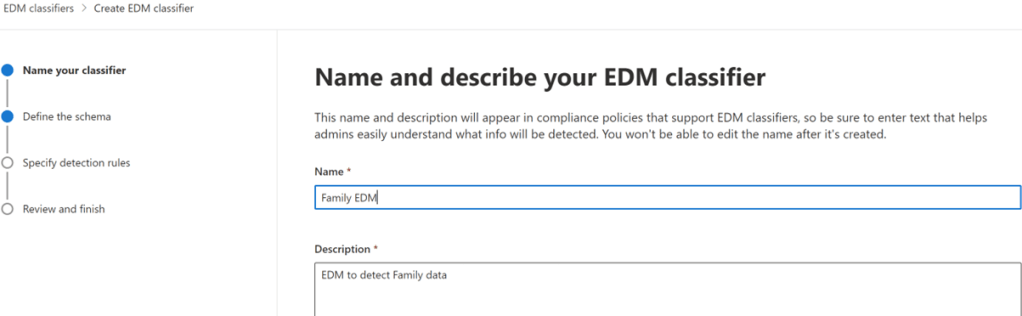
Next I will click on New EDM Classifier and fill the following details.
Name the SIT and add a description. The system uses this name, appended with the word schema, for the associated schema it generates.
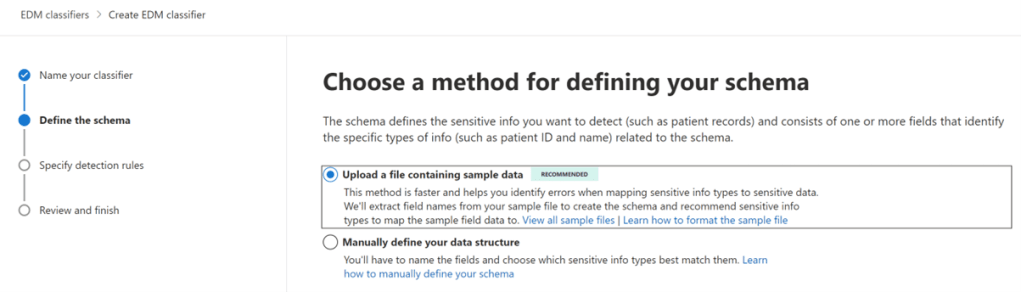
Choose a method for defining your schema. You can either upload using the sample file or manually define the data structure.
Since I have already prepared the sample file I will simply upload the same using the first option.
Now the portal will prompt me to upload the file that I created.
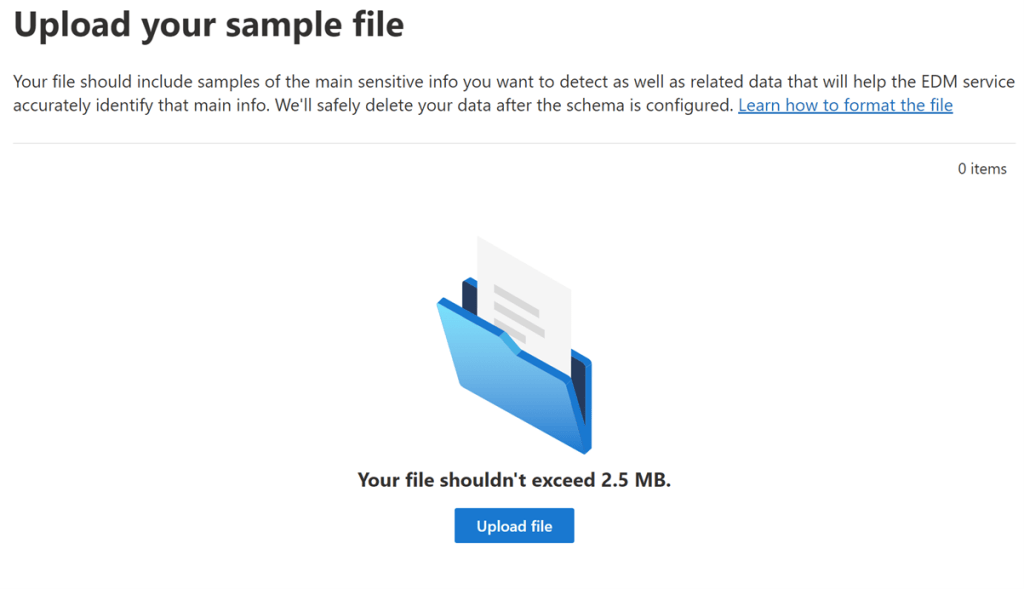
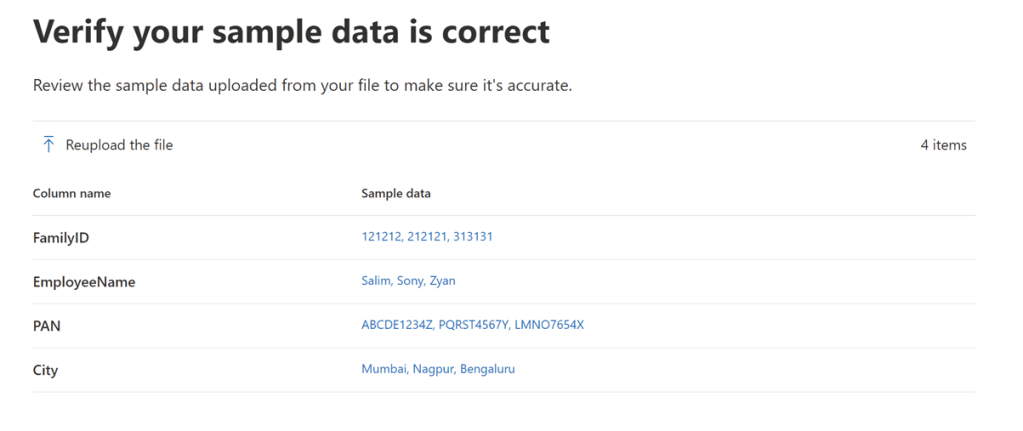
I will browse the CSV file Company Data and proceed with the upload. Once uploaded the portal will ask me to validate if the data is correct. If everything is correct then I will proceed with the next steps.
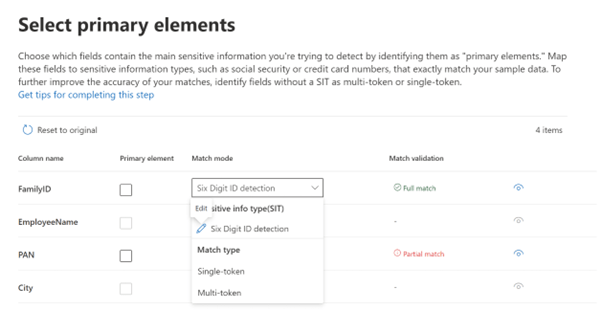
Now the portal will ask me to specify which fields I want to consider as the primary element. Here I have selected FamilyID as the primary element and I have a custom SIT already available that detects 6 digit numbers as my FamilyID is of 6 digits.
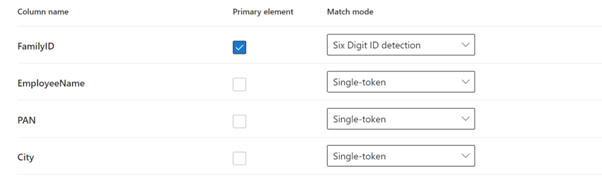
Match Mode
Single-Token Matching:
Imagine you have a field in your data, like a customer’s name.
In single-token matching, Exact Data Match (EDM) compares individual words (or tokens) within that field.
For example, if the customer’s name is “Jane Doe,” EDM would compare the hashes of “Jane” and “Doe” separately.
If both individual tokens match the content, EDM considers it a match.
However, this approach might miss detections if the full name “Jane Doe” isn’t explicitly present in the content.
Multi-Token Matching:
Now, consider a more complex field, like an address (“123 Main Street, New York, NY”).
Multi-token fields consist of several words (tokens) separated by spaces.
In multi-token matching, EDM compares consecutive tokens (e.g., “123,” “Main,” “Street”) together.
For instance, if your content contains the same address, EDM checks the combined hash of all tokens.
If any combination matches the hashed value in your data source, it’s considered a match.
This approach improves accuracy, especially for multi-token fields.
Configure settings for data in selected columns
Here you get an option to configure whether the columns are case insensitive (on by default) and whether to ignore delimiters.

Case-Insensitive:
When something is “case-insensitive,” it means that the system treats uppercase and lowercase letters as equivalent.
For example, if you have a field with the value “FOO-1234,” a case-insensitive system would also consider “fOo#1234” as the same.
So, it doesn’t matter if the characters are in uppercase or lowercase; they match regardless.
Ignored Delimiters:
Delimiters are characters (like spaces, commas, or hyphens) that separate words or tokens in a field.
When you ignore delimiters, EDM (Exact Data Match) looks at the content without considering these separators.
For instance, if your field contains “Jane Doe,” ignoring delimiters means EDM treats “JaneDoe” or “Jane-Doe” as equivalent.
It helps improve matching accuracy by focusing on the actual data, not the punctuation.
Configure detection rules for primary elements
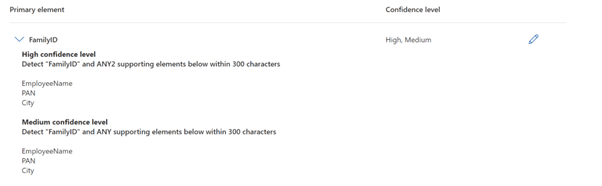
Next you get an option to create the detection rule for the primary element. In my LAB I have used FamilyID as the primary element and have a corresponding base SIT already present that uses a regex to detect 6 a digit number.
I have two rules.
- High confidence – FamilyID + any 2 supporting elements from Employee Name, Pan and city within the proximity of 300 characters
- Medium confidence – FamilyID + any supporting elements from Employee Name, Pan and city of 300 characters.
Please note the confidence increase with the increase in the number of supporting elements.
Now I click submit and my EDM classifier get’s created.
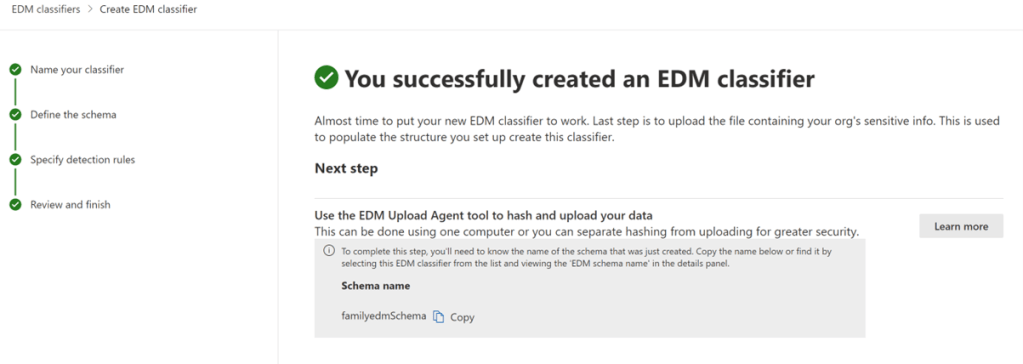
Make a note of the schema name. I will copy the Schema Name to a notepad and I would be needing it in a while.
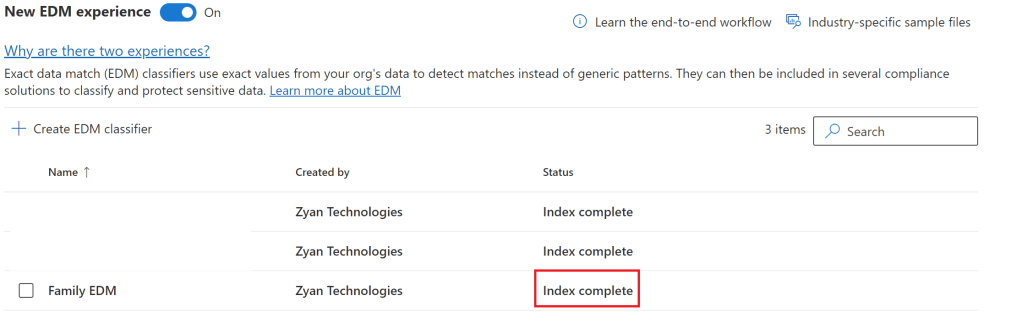
Once created you should see the status as source file not uploaded yet.
Remember we just created the EDM classifier but what about the custom data? Where would EDM query for the company specific data from? We need to now hash and upload the data.
Choosing the right method.
The EDM Upload Agent offers two options for hashing and uploading your sensitive data:
1. Combined Hashing & Upload (One Computer):
- This is simpler but requires placing your clear-text data on a computer with direct Microsoft 365 tenant access.
2. Separate Hashing & Upload (Two Computers – More Secure):
- Hash your data on a secure computer (no clear-text data exposed).
- Transfer the hashed file and a generated “salt” file to a computer with direct Microsoft 365 tenant access for upload.
Step-by-Step Guide (Choose your preferred method): Here we will be following method 1
Prerequisite
1) Work or school account for Microsoft 365 to add to the EDM_DataUploaders security group
2) Windows 10, Windows Server 2016 with .NET version 4.6.2, or a Windows Server 2019 machine for running the EDM Upload Agent
3) Download Agent: Get the EDM Upload Agent from https://go.microsoft.com/fwlink/?linkid=2088639
Method 1: Combined Hashing & Upload (One Computer)
– Ensure the computer has direct Microsoft 365 tenant access.
– Place your clear-text data on this computer.
– Follow the EDM Upload Agent instructions for uploading your data file.
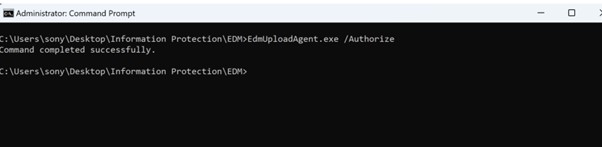
Once you download the EDM tool, you must authorize the same using your work account. Please remember that the account is the member of EDM_DataUploaders security group. Your tenant information is extracted from the user account to make the connection.
Command : EdmUppadAgent.exe /Authorize

You should get the below screen once authenticated.
Next you must download the schema that you created using the portal. To do so, you must run the following command.
EdmUploadAgent.exe /SaveSchema /DataStoreName <schema name> /OutputDir <path to output folder>

Here is how my schema looks

Once I have the schema file, I will now hash and upload the data.
To hash and upload the sensitive data, run the following command in Command Prompt window:
EdmUploadAgent.exe /UploadData /DataStoreName [DS Name] /DataFile [data file] /HashLocation [hash file location] /Schema [Schema file] /AllowedBadLinesPercentage [value]
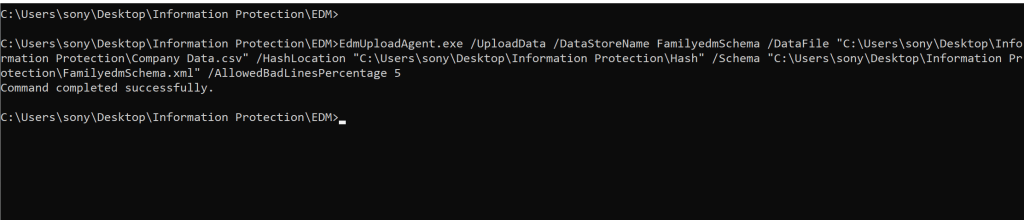
Once successfully completed the portal will change the status to index complete.
You can refresh your database of sensitive information up to 5 times in every 24-hour period.
Our custom EDM sit is not ready to be used with the following services.
Microsoft Purview Data Loss Prevention
Auto-labeling (service and client side)
Microsoft Purview Insider Risk Management policies
Microsoft Purview eDiscovery
Microsoft Purview Insider Risk Management
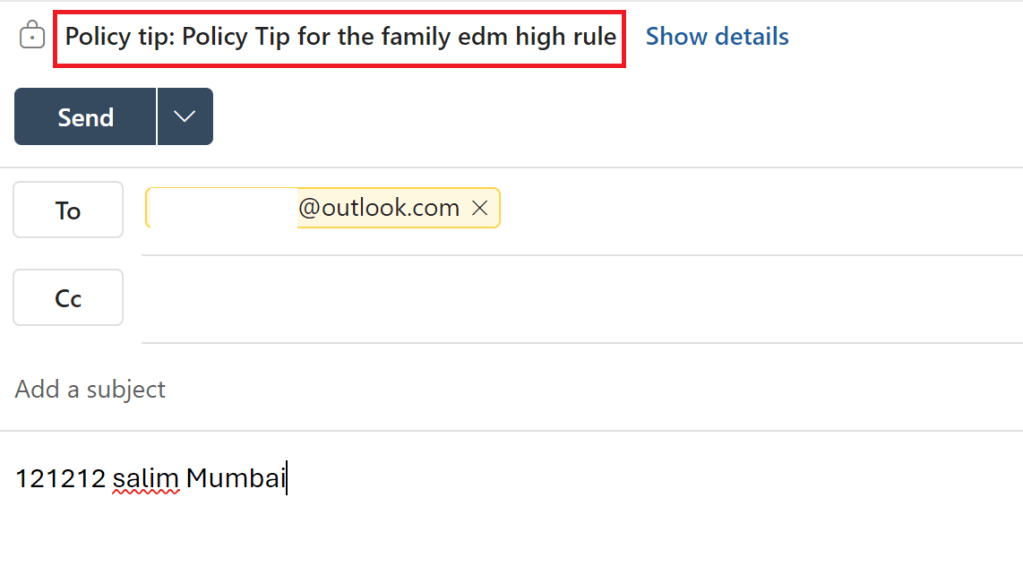
Microsoft Defender for Cloud Apps I have already created a DLP policy and used this SIT and apply appropriate protection when detected. DLP will be covered in a different series so I will not go through the steps here.

I haven’t gone deep with EDM with thousands of words to bore the audience but I guess this covers the essence of what EDM SIT is and how can it can help protect the organization specific data.

Leave a comment